Adding Microix CE Barcode Application to DataLogic Handheld Scanner Memor
Creation date: 7/22/2019 6:25 PM
Updated: 7/22/2019 6:38 PM
Step 1. Connect device to a Windows PC via the USB cable. See kb article if your PC is not recognizing the devicehttps://microix.info/helpdesk/KB/View/24241-windows-pc-will-not-recognize-the-barcode-device-when-connected-to-usb-port
Step 2. After connecting, follow the steps below to copy both the “AppSettings.xml” and “MicroixCE.exe” to your device. Repeat this process for each barcode device
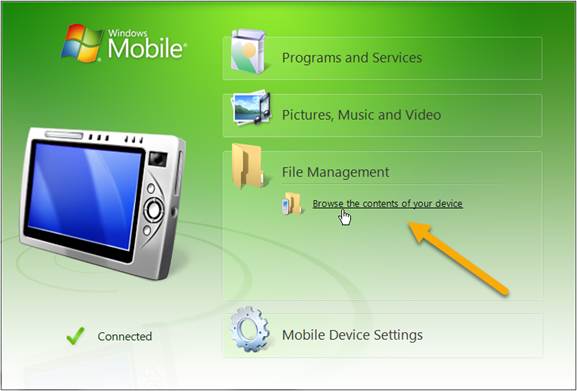
Step 3. Open Windows Mobile Device Center and click on File Management>Browse the contents of your device
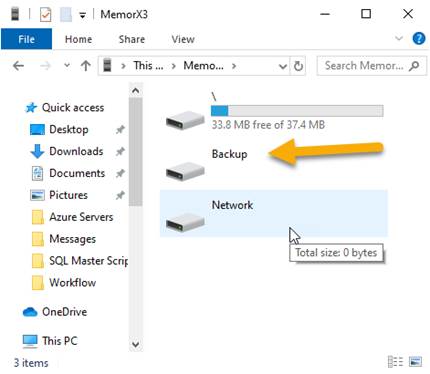
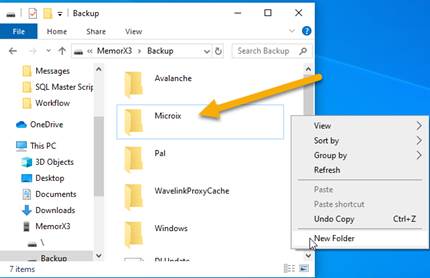
Step 4. Using Windows File Explorer, navigate to the Backup Drive and create a new folder called "Microix". Next, copy both "AppSettings.xml" and "MicroixCE.exe" to the folder. (Note: Use the link below to download both files)
(v2019.1 AppSettings.xml, MicroixCE.exe)
http://www.microix.info/download/MicroixCE/Microix/
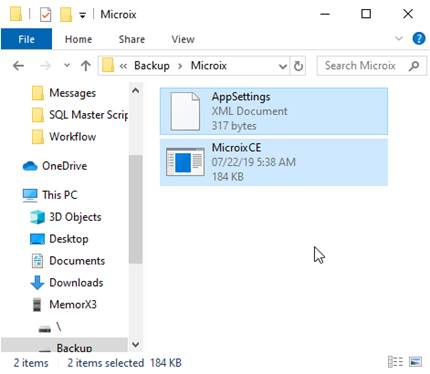
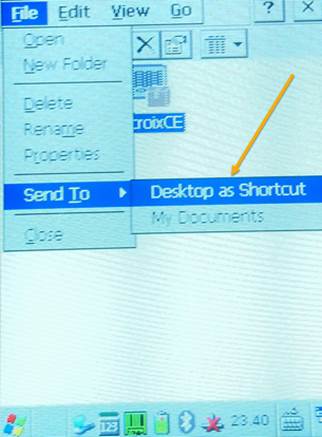
Step 5. Create a shortcut to the desktop by selecting the MicroixCE and click on File>Send To>Desktop as Shortcut
Step 2. After connecting, follow the steps below to copy both the “AppSettings.xml” and “MicroixCE.exe” to your device. Repeat this process for each barcode device
Step 3. Open Windows Mobile Device Center and click on File Management>Browse the contents of your device
Step 4. Using Windows File Explorer, navigate to the Backup Drive and create a new folder called "Microix". Next, copy both "AppSettings.xml" and "MicroixCE.exe" to the folder. (Note: Use the link below to download both files)
(v2019.1 AppSettings.xml, MicroixCE.exe)
http://www.microix.info/download/MicroixCE/Microix/
Step 5. Create a shortcut to the desktop by selecting the MicroixCE and click on File>Send To>Desktop as Shortcut