Attachments transfer from Microix to MIP.
Transferring Attachments from Microix to MIP


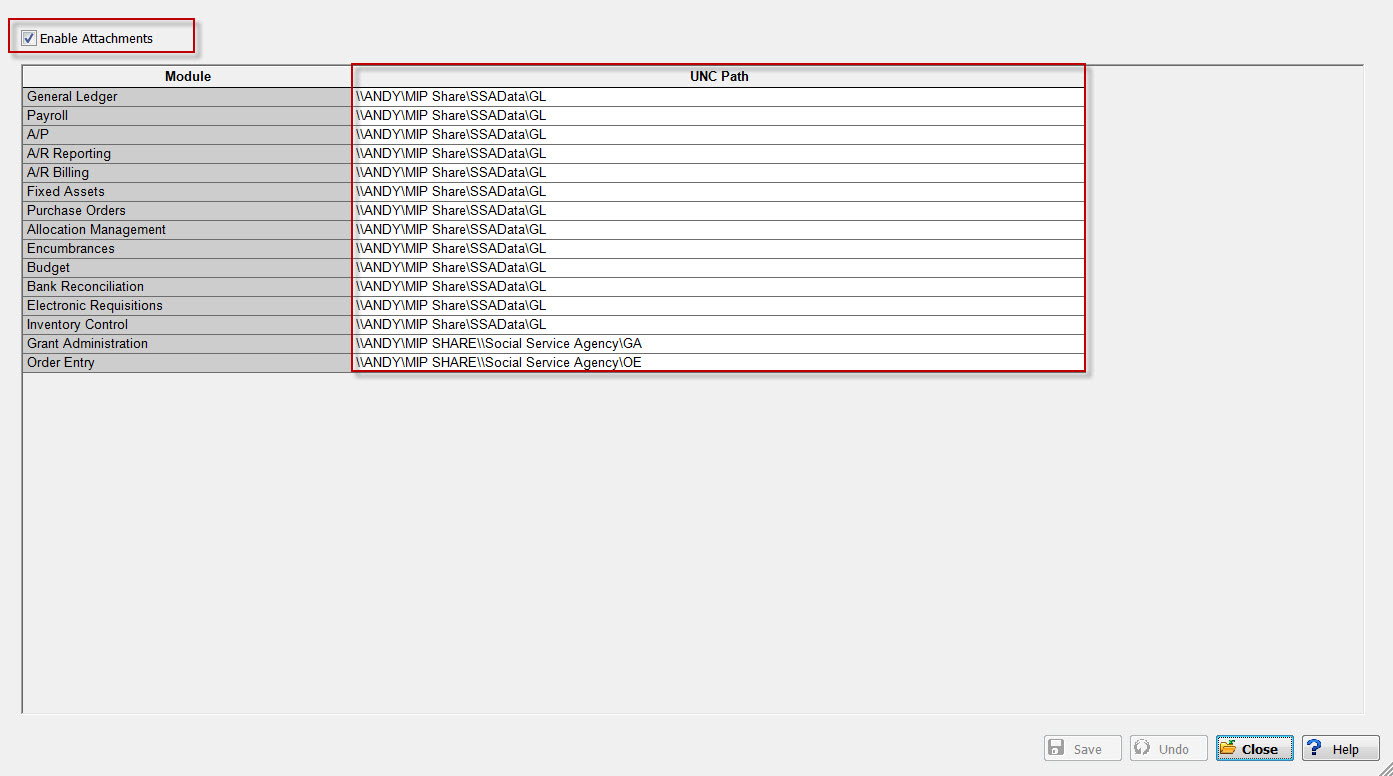
Step 2: From System Setup - Select "Setup User Attachment Categories

"Enable Attachments" should be checked and verify a valid UNC Path is specified for Encumbrance and Accounts Payable. If you get error while saving Attachment location page you may also have to correct UNC Path for other module as well and read/write permission should be granted for the windows account.

RE: Version 2021.X or higher (on premise or hosting environment)
IMPORTANT: For MIP Hosting Environment, the following GSID (901) should be enabled
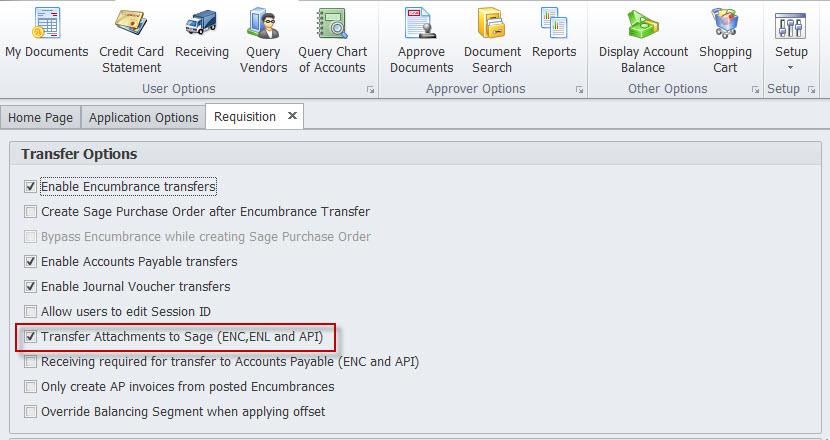
Step 1: Navigate to Maintenance - Setup - Requisition - Enable the option - "Transfer Attachments to Sage (ENC,ENL and API)".
Step 2: From System Setup - Select "Setup User Attachment Categories
"Enable Attachments" should be checked and verify a valid UNC Path is specified for Encumbrance and Accounts Payable. If you get error while saving Attachment location page you may also have to correct UNC Path for other module as well and read/write permission should be granted for the windows account.
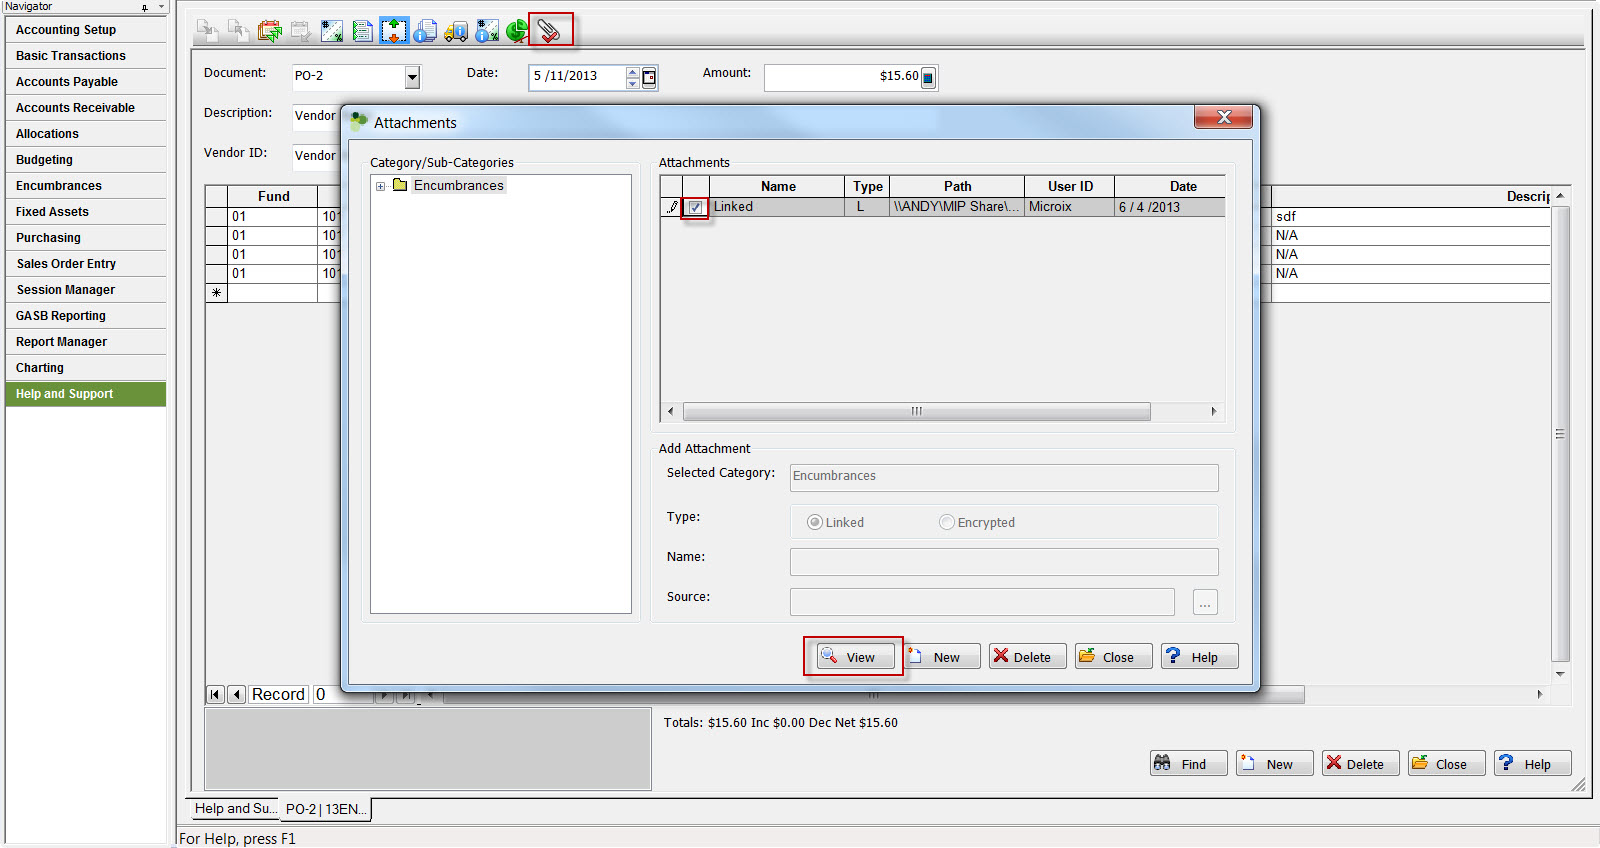
After configuration, you may test the process by transferring a document with an attachment to MIP and verify the results. To view the attachment clicking on the paper clip icon as shown below:
