How to setup Microix Alerts
Creation date: 5/4/2021 5:59 PM
Updated: 3/10/2022 12:01 PM
Question:
Microix Alerts helps to trigger emails for Missed Punches, Absent Employees, Document waiting at Requester level, Document waiting for Approval.
Setup System Alerts in Microix Workflow Modules
Step 1: Login as “Admin” and navigate to Maintenance – System Alerts
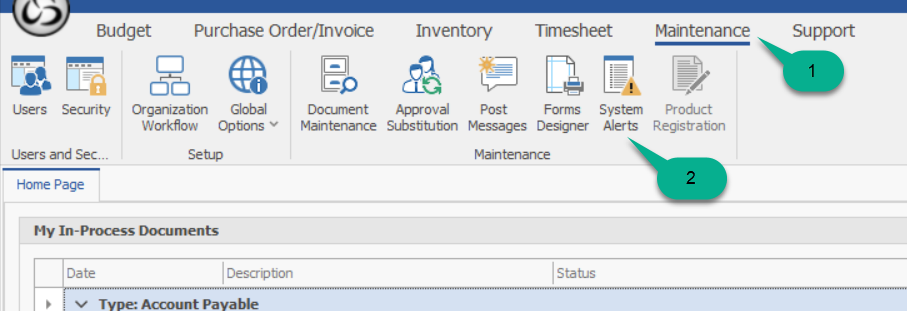
Step 2: Click on + button to add a new alert
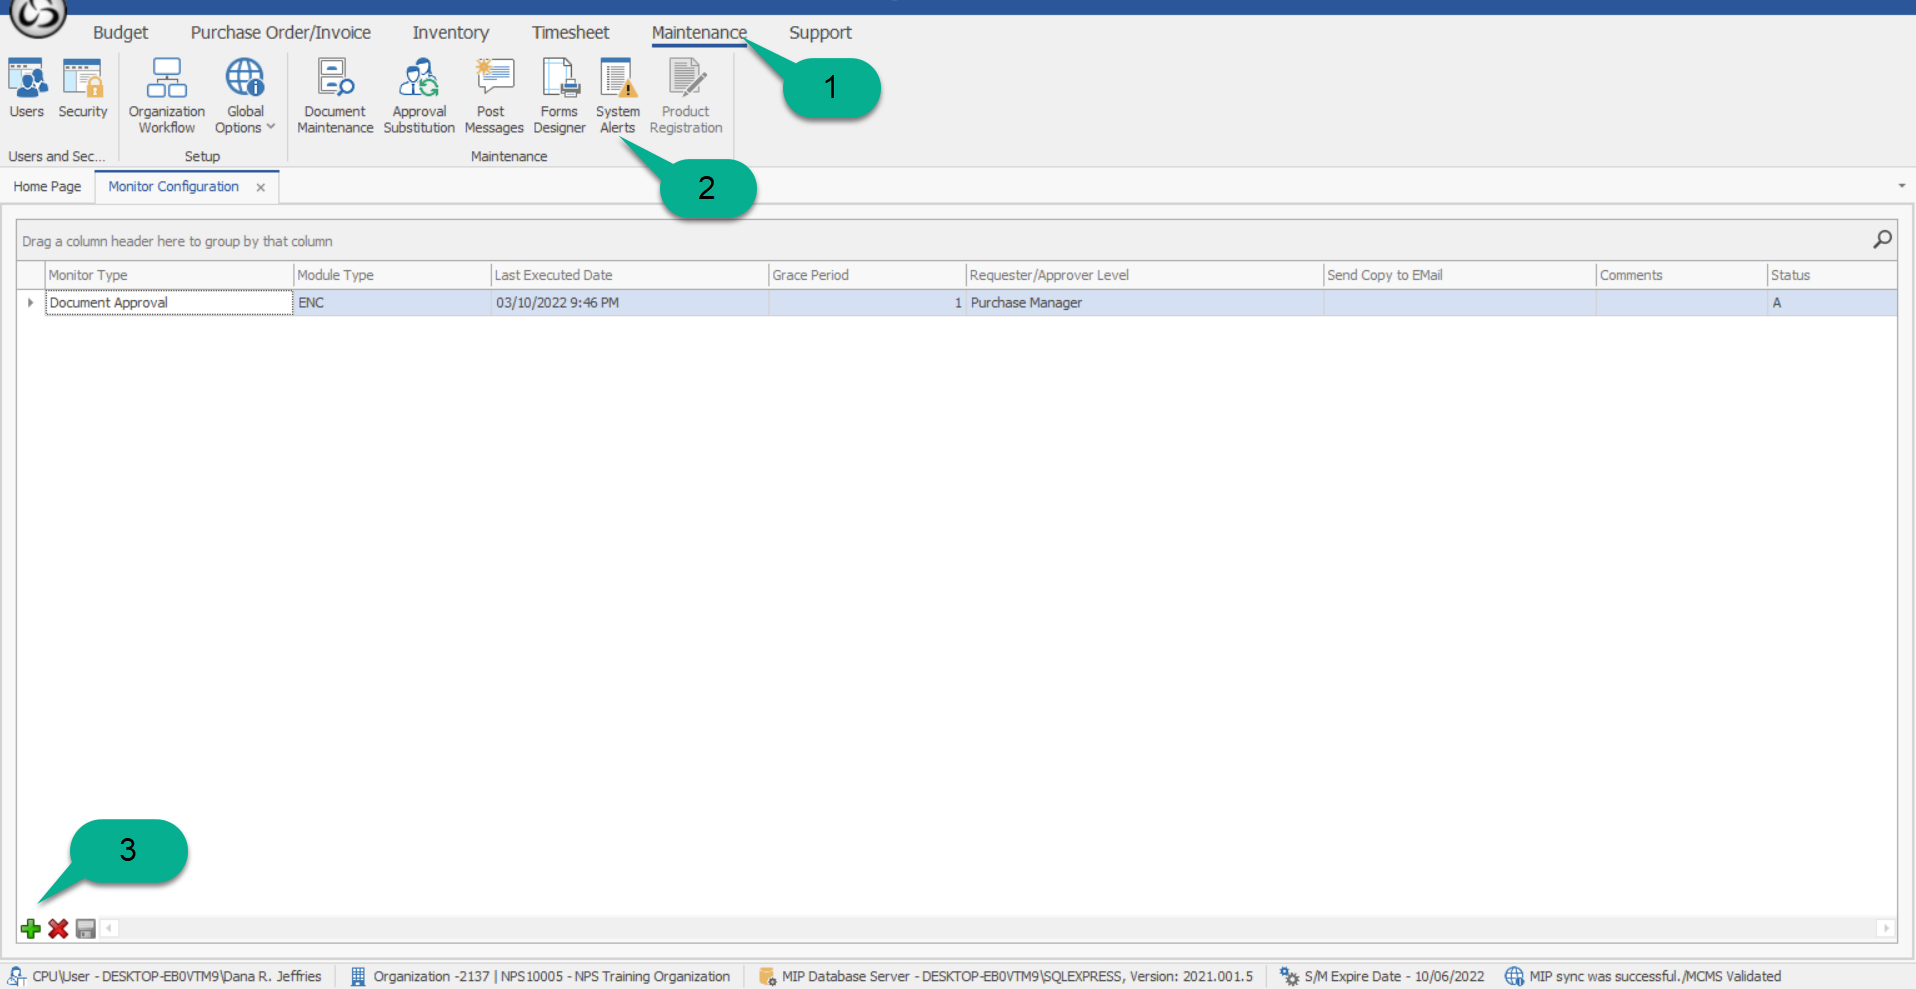
Step 3:
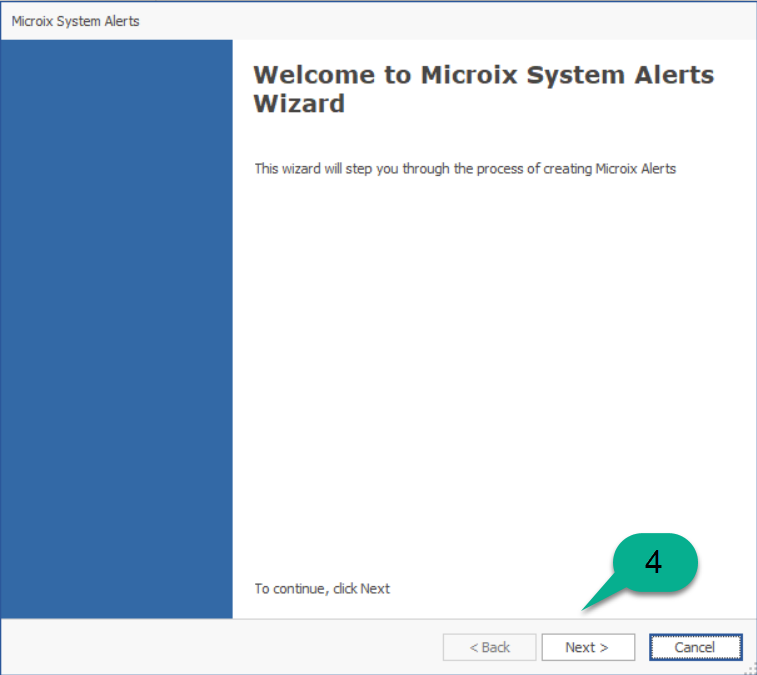
Step 4: Select the Alert Type
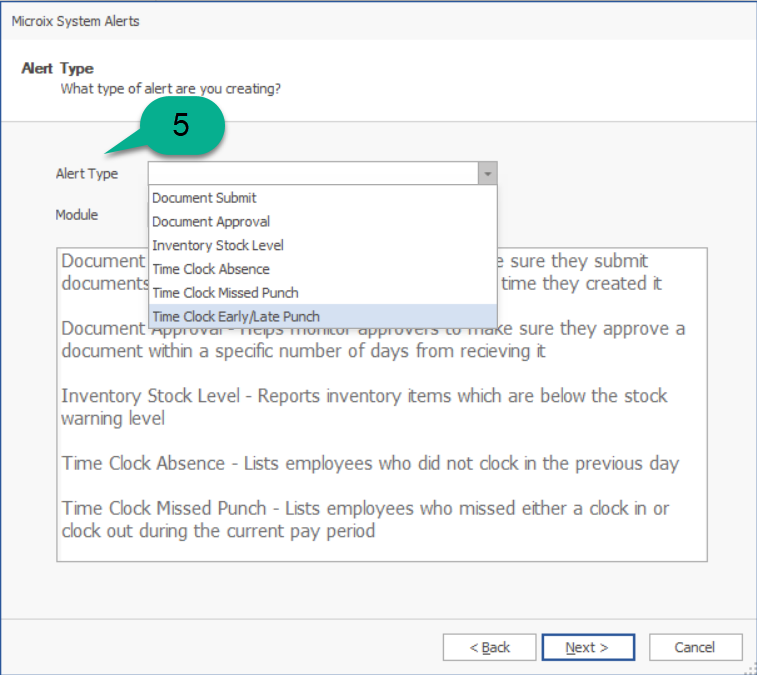
Step 5: Select the Module Type
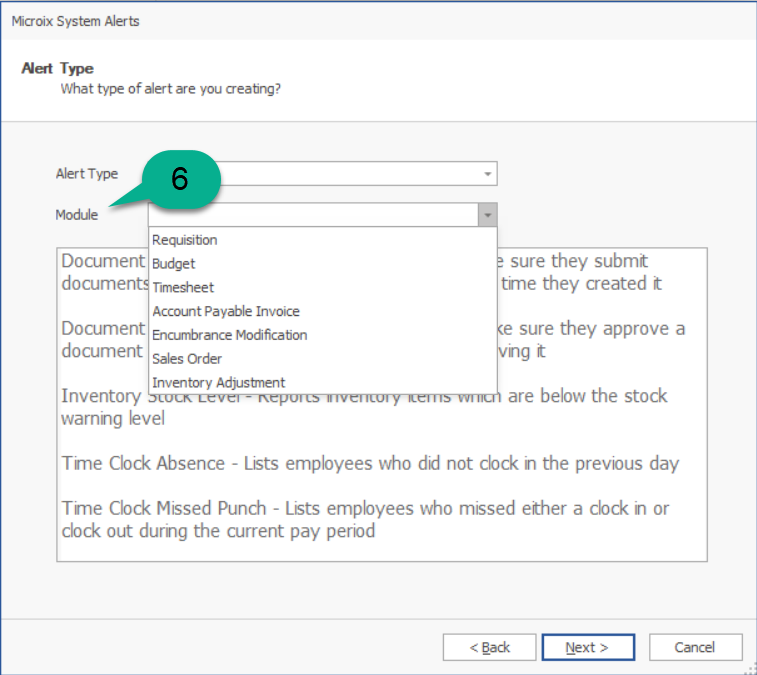
Step 6: Set the number of days system should sent alert.
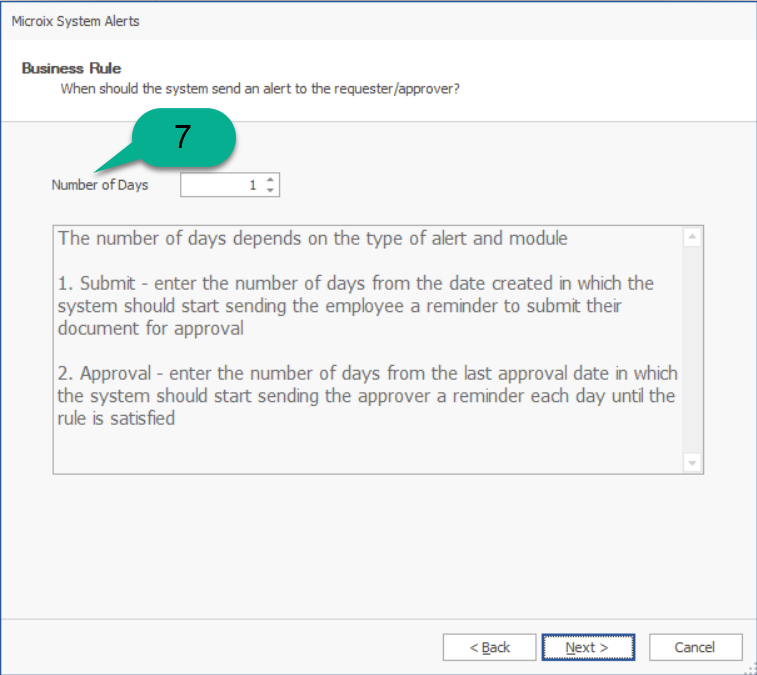
Step 7:
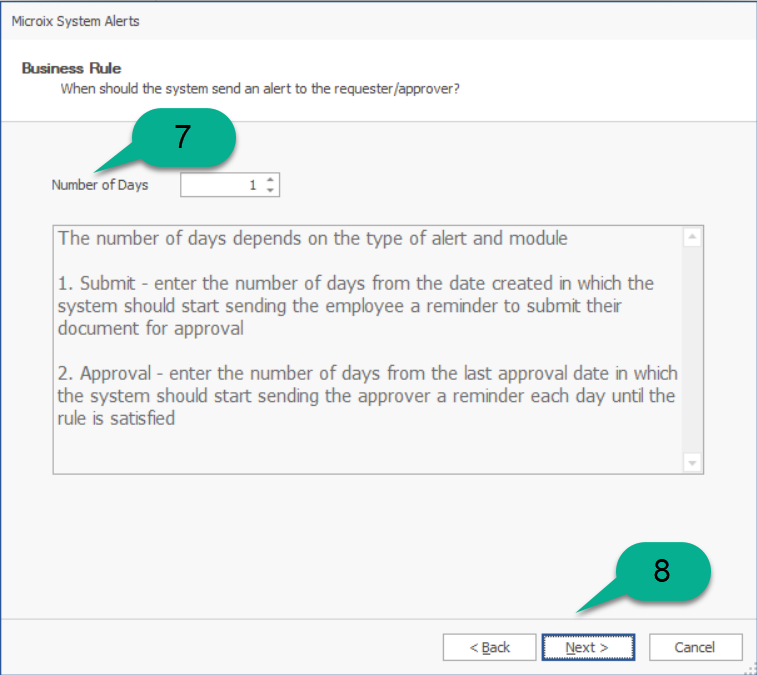
Step 8:
Finally, we need to setup task scheduler on the MIP/Microix Server to execute the task by specifying the day and time.
Setup Task Scheduler for Microix Alerts on Microix SQL Server:
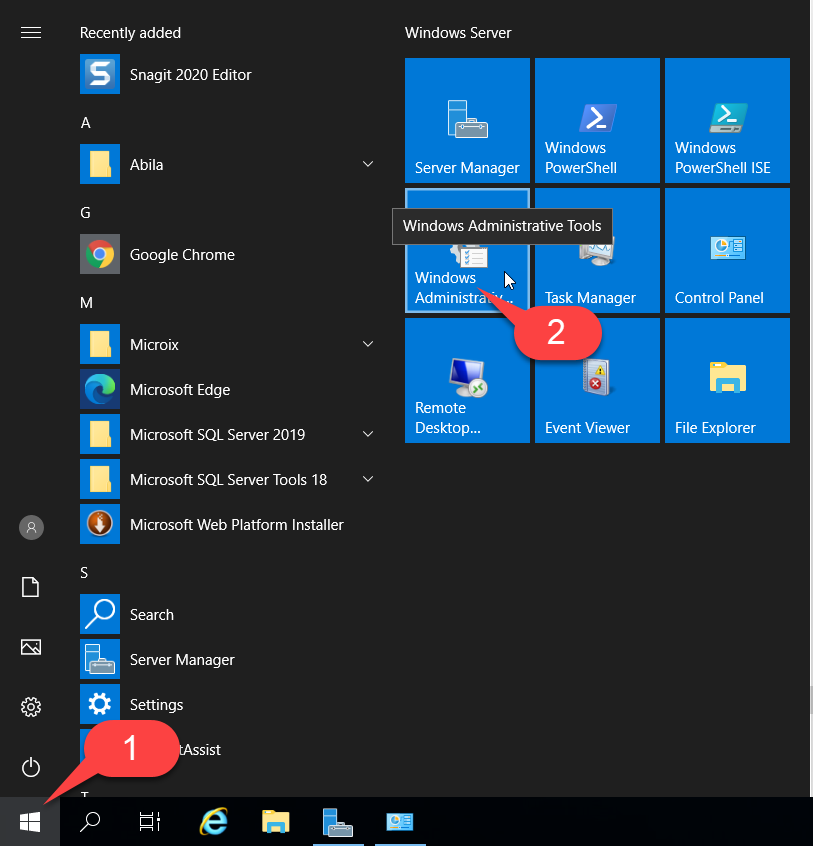
Step 10: Open Task Scheduler and create a new Task (Administrative Tool>Task Scheduler)
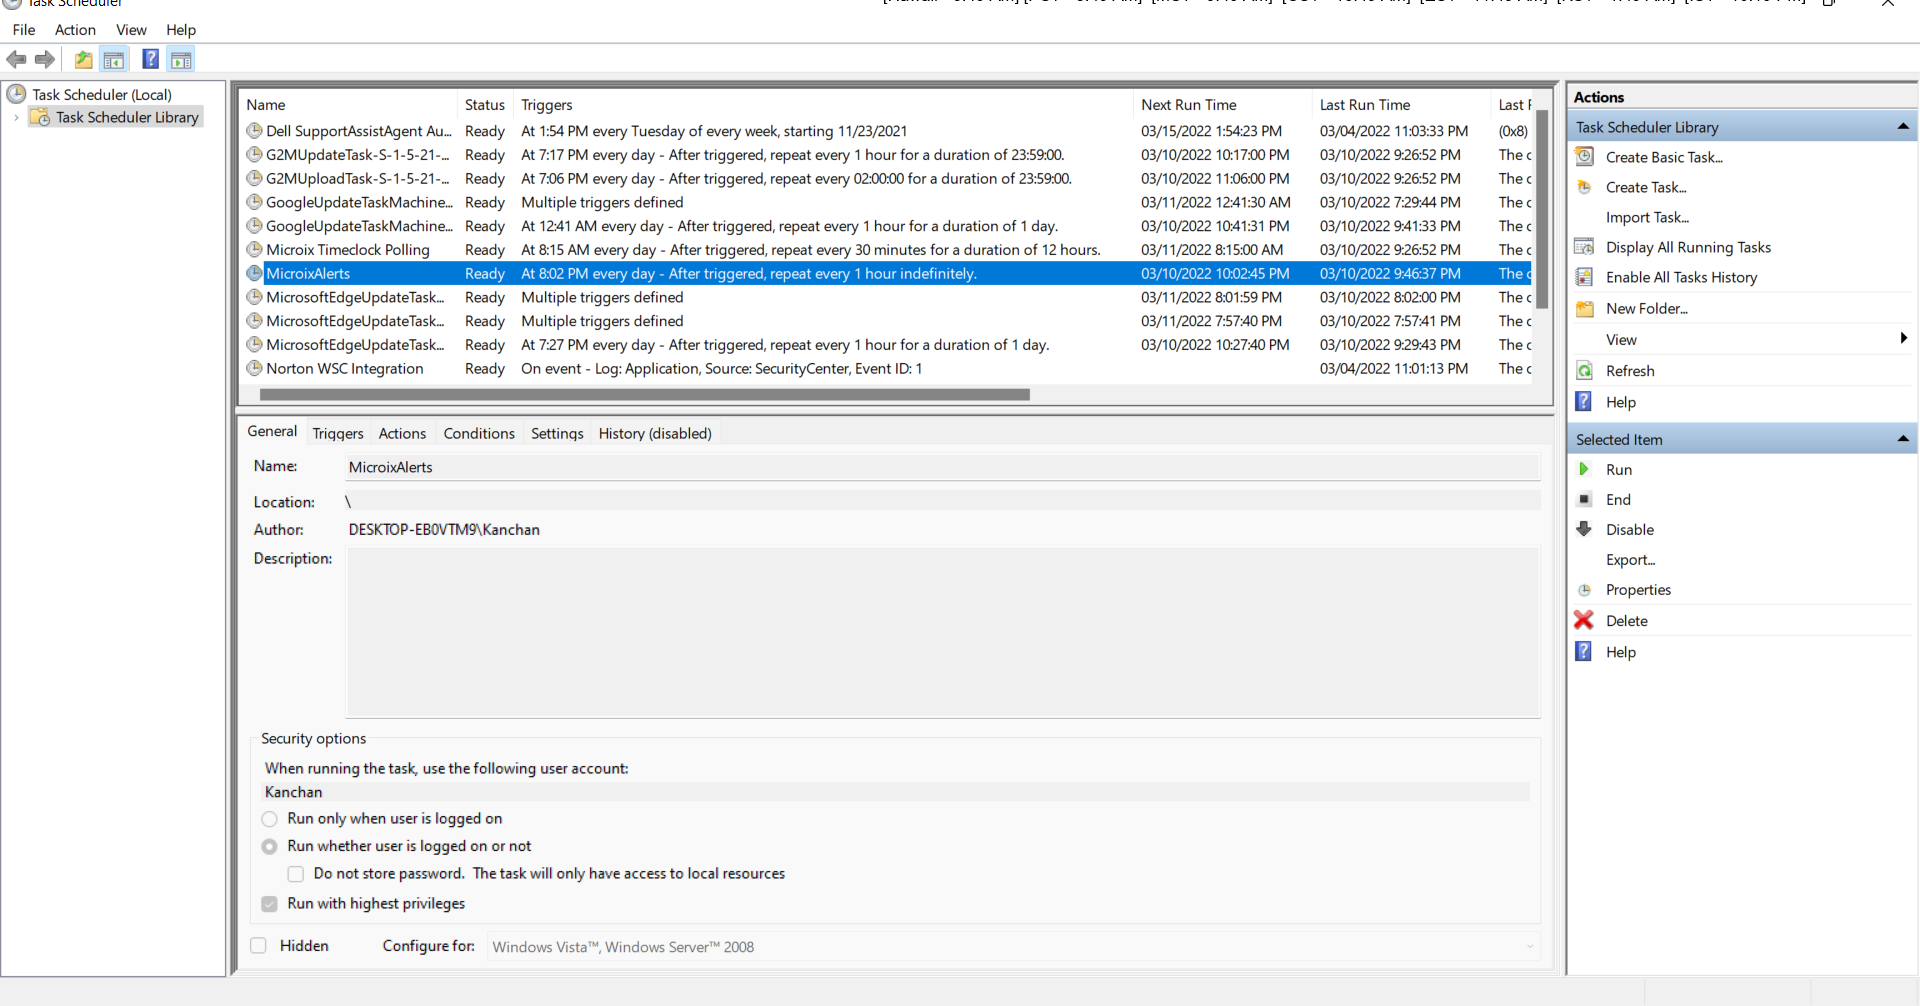
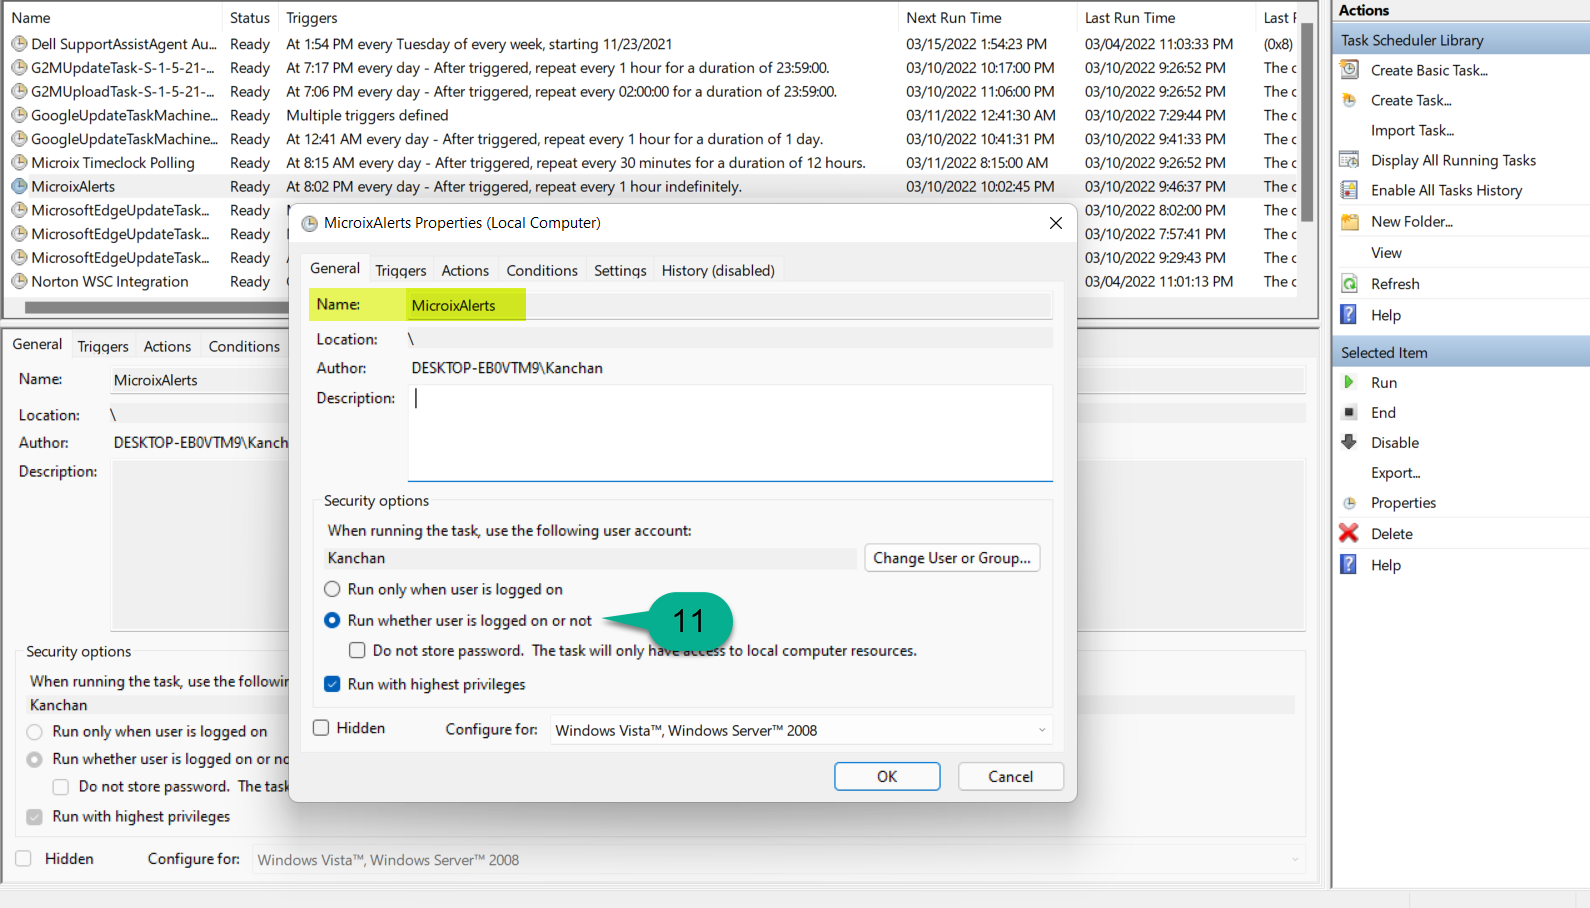
Step 11: Name the Task (MicroixAlerts_TaskName). IMPORTANT: Make sure to allow the task to run when user is logged in or not.
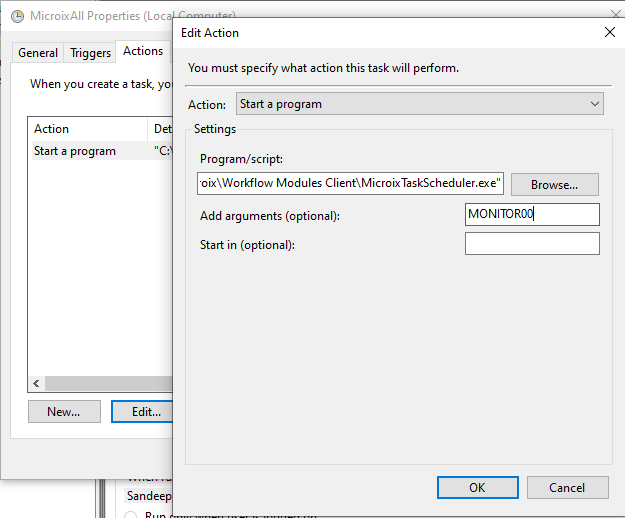
Step 13: On the Action Tab select “MicroixTaskScheduler.exe” which is located under “C:\Program Files\Microix\Workflow Modules Client\".
Add the predefined Microix arguments. You can find the example of arguments from
Start – Run (“C:\Program Files\Microix\Workflow Modules Client\MicroixTaskScheduler.exe")
Examples of Arguments:
00 – Will Run all the task except attachments
20 – Send alerts when employee are missing a punch
21 - Send alerts when employees are absent.
You can create separate jobs for each task or create a single job with Argument “00”
Note: For Argument 30 (Auto-Attachment Feature) follow the instructions : http://www.microix.info/helpdesk/KB/View/6959-configure-and-test-the-autoattachment-feature
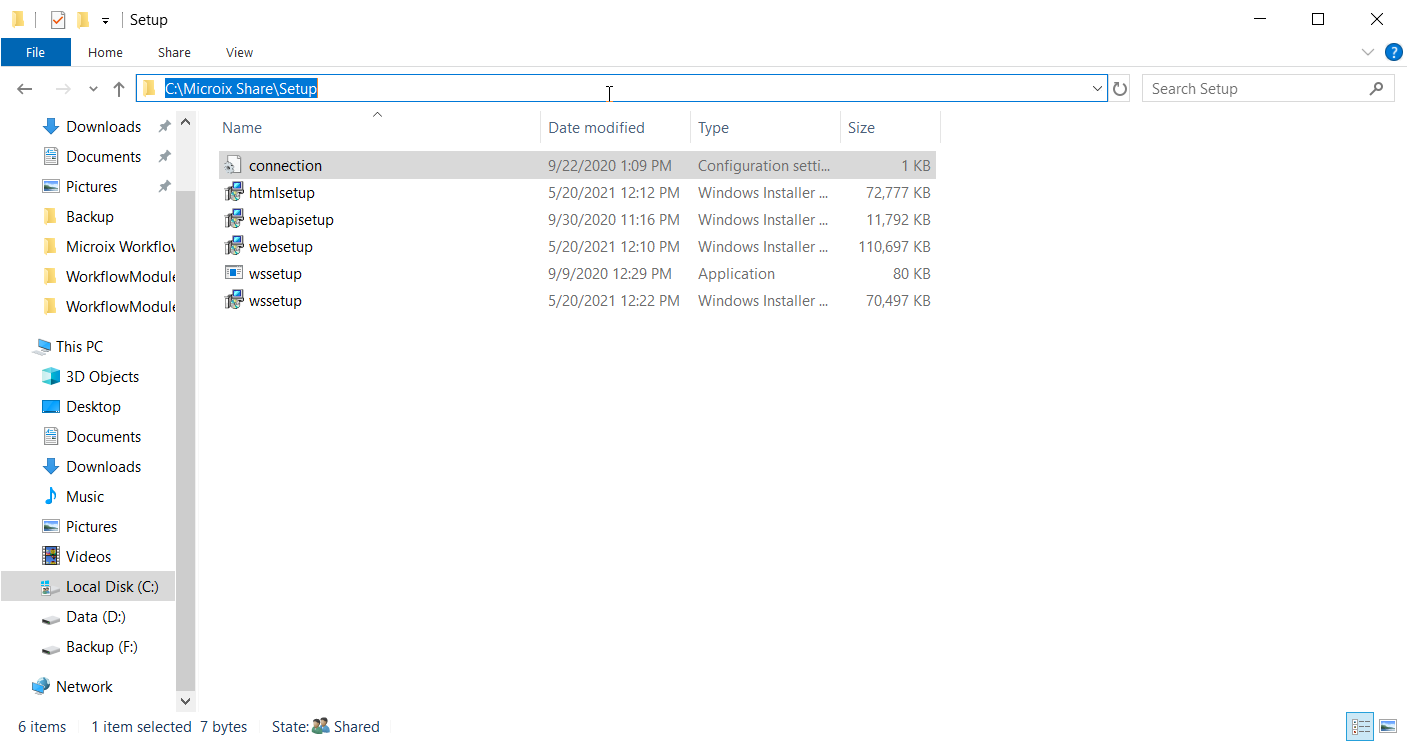
Step 14: Verify the sql server name is correct in connection.ini file on your sql server.
Microix Alerts helps to trigger emails for Missed Punches, Absent Employees, Document waiting at Requester level, Document waiting for Approval.
Setup System Alerts in Microix Workflow Modules
Step 1: Login as “Admin” and navigate to Maintenance – System Alerts
Step 2: Click on + button to add a new alert
Step 3:
Step 4: Select the Alert Type
Step 5: Select the Module Type
Step 6: Set the number of days system should sent alert.
Step 7:
Step 8:
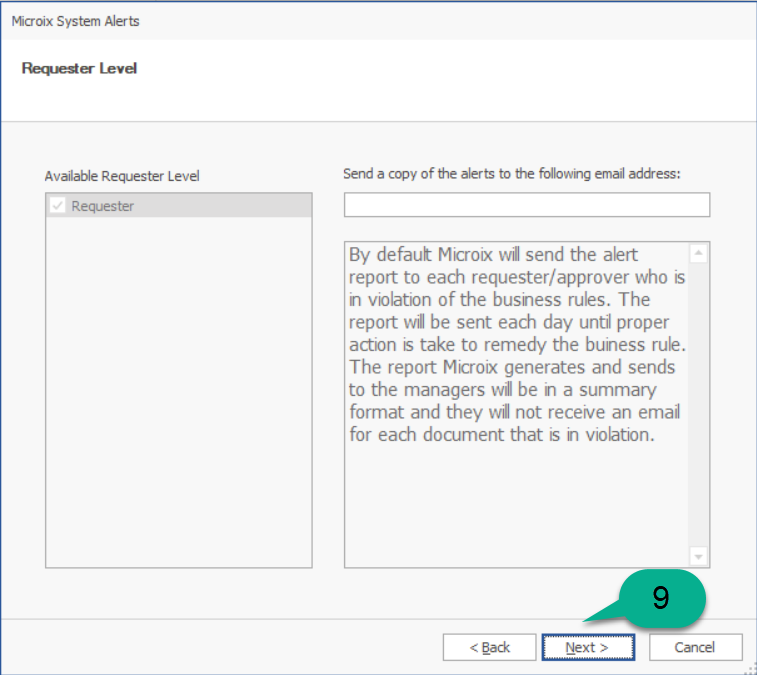
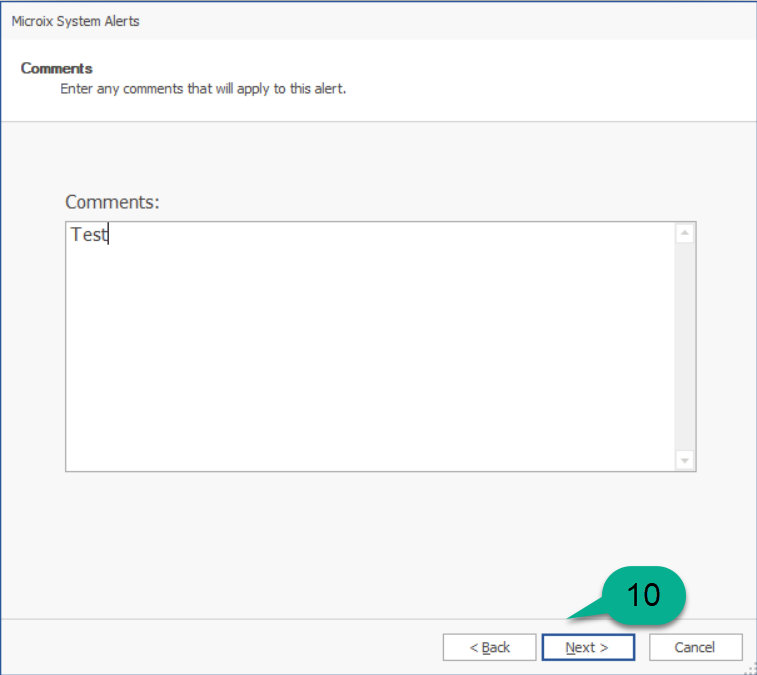
Step 9:
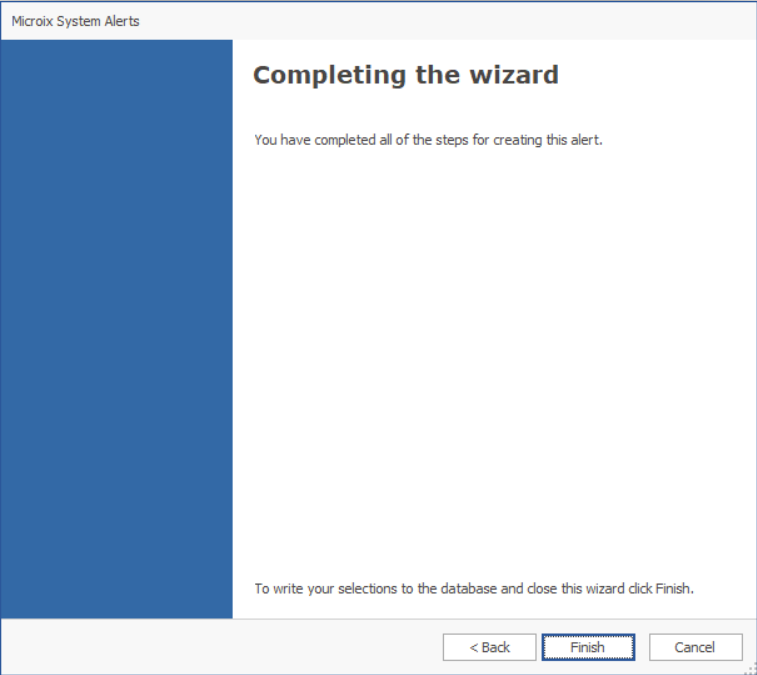
Finally, we need to setup task scheduler on the MIP/Microix Server to execute the task by specifying the day and time.
Setup Task Scheduler for Microix Alerts on Microix SQL Server:
Step 10: Open Task Scheduler and create a new Task (Administrative Tool>Task Scheduler)
Step 11: Name the Task (MicroixAlerts_TaskName). IMPORTANT: Make sure to allow the task to run when user is logged in or not.
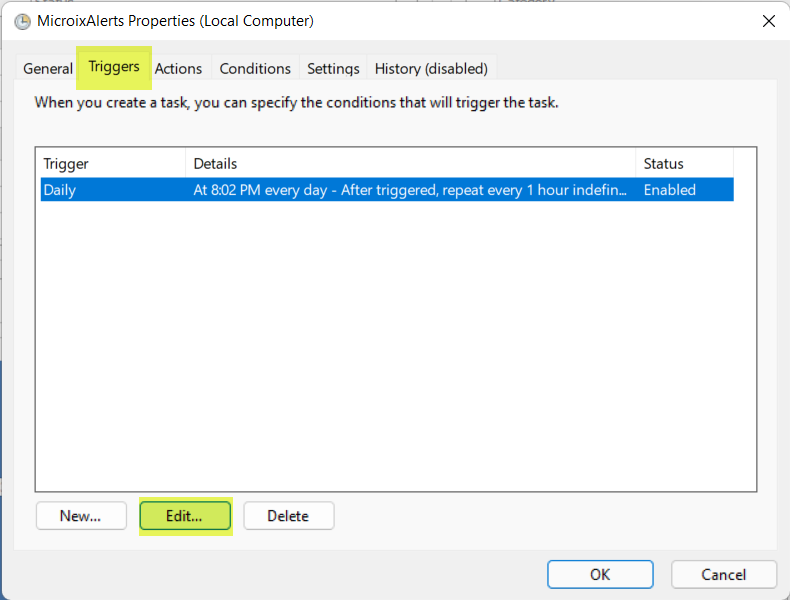
Step 12: On the Triggers tab set the scheduler to run once a Day.
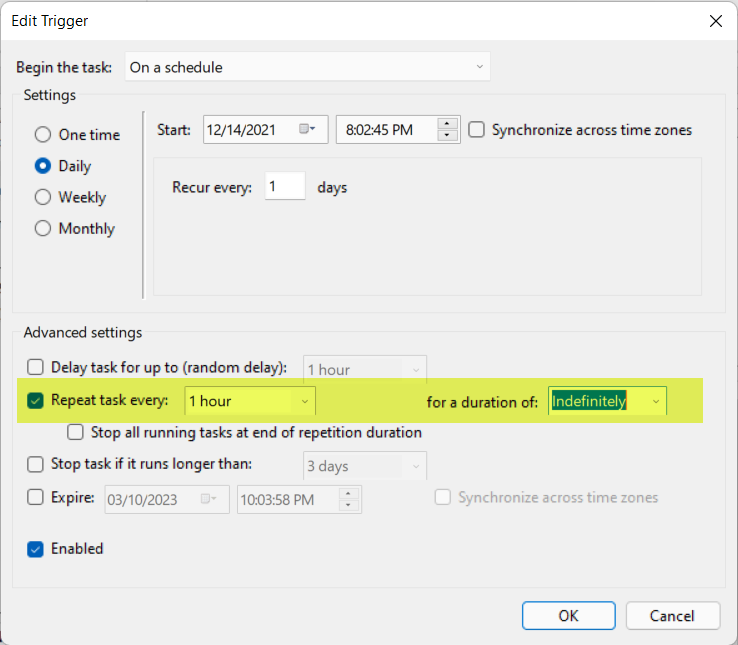
Step 13: On the Action Tab select “MicroixTaskScheduler.exe” which is located under “C:\Program Files\Microix\Workflow Modules Client\".
Add the predefined Microix arguments. You can find the example of arguments from
Start – Run (“C:\Program Files\Microix\Workflow Modules Client\MicroixTaskScheduler.exe")
Examples of Arguments:
00 – Will Run all the task except attachments
20 – Send alerts when employee are missing a punch
21 - Send alerts when employees are absent.
You can create separate jobs for each task or create a single job with Argument “00”
Note: For Argument 30 (Auto-Attachment Feature) follow the instructions : http://www.microix.info/helpdesk/KB/View/6959-configure-and-test-the-autoattachment-feature
Step 14: Verify the sql server name is correct in connection.ini file on your sql server.