How to change Currency symbol in Microix.
Creation date: 10/18/2018 11:02 AM
Updated: 10/18/2018 12:42 PM
Note: The currency symbol is pulled from windows OS. Microix does not provide support on this. Once you can pull your currency in the drop-down on Step 3, Microix should be able to display it in Workflow Modules.
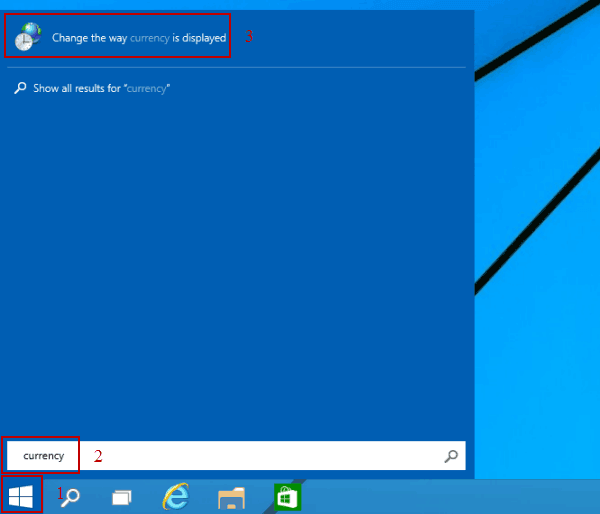
Customize currency format on Windows 10: Step 1: Click the bottom-left Start button on the desktop, type currency in the search box and tap Change the way currency is displayed.

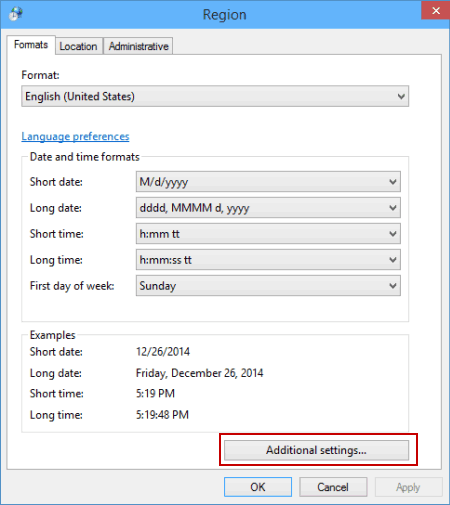
Step 2: Open Additional settings in the Region window.

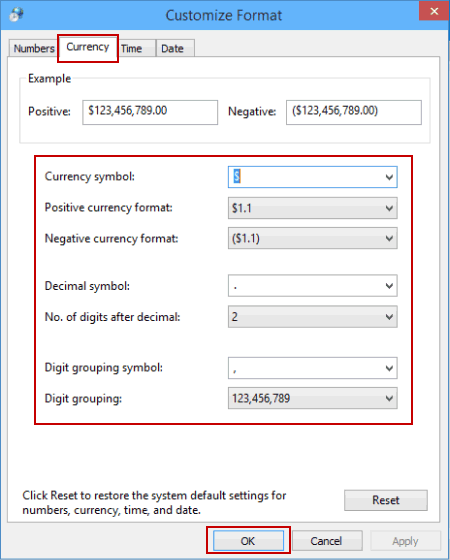
Step 3: Choose Currency, change the formats of currency symbol, positive currency, negative currency, decimal symbol, no. of digits after decimal, digit grouping symbol or digit grouping, and then click OK.

Step 4: If you do not see your currency in the drop-down. You can download the language on your Windows before following the above steps.
Step 5: Go to Control Panel > Region and Language > Keyboards and languages tab . Click on ‘Change Keyboards…’ and under ‘General’ tab , click on ‘Add…’ and tick the name of your country, you can also find this under English (United States) Keyboards.
Step 6: Repeat Step 1 to 3.
Customize currency format on Windows 10: Step 1: Click the bottom-left Start button on the desktop, type currency in the search box and tap Change the way currency is displayed.

Step 2: Open Additional settings in the Region window.

Step 3: Choose Currency, change the formats of currency symbol, positive currency, negative currency, decimal symbol, no. of digits after decimal, digit grouping symbol or digit grouping, and then click OK.

Step 4: If you do not see your currency in the drop-down. You can download the language on your Windows before following the above steps.
Step 5: Go to Control Panel > Region and Language > Keyboards and languages tab . Click on ‘Change Keyboards…’ and under ‘General’ tab , click on ‘Add…’ and tick the name of your country, you can also find this under English (United States) Keyboards.
Step 6: Repeat Step 1 to 3.