How to Install Microix Timeclock Manger - Off-Site, On Premise, Abila
Creation date: 10/9/2018 2:24 PM
Updated: 7/25/2025 3:27 PM
Question:
Step 1. File Download:ftp://www.microix.com/workflowmodules_2017/TimeClockManager/
Step 1. File Download:ftp://www.microix.com/workflowmodules_2017/TimeClockManager/
Step 2. Install Timeclock Manger on the MIP Fund Accounting Server or a computer that is on 24/7
Step 3. Choose ONE of the following installation process:
A) On-Premise Installation (MIP/Microix is installed on a local Server)
B) Off-Site Hosting(Microix and MIP is installed on a hosted server)
C) Abila Cloud (Microix is Hosted on Abila Cloud Server - Multi-tenant environment)
Step 4. Accept the default location and click Next
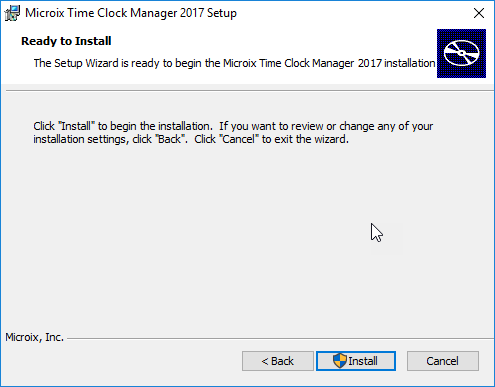
Step 5. Click Install and Finish to complete the installation process
Step 6. Edit the Windows Task Scheduler and modify the “Microix Timeclock Polling” (Recommended: disable this task until all clocks are configured, then return to enable the task)
Step 3. Choose ONE of the following installation process:
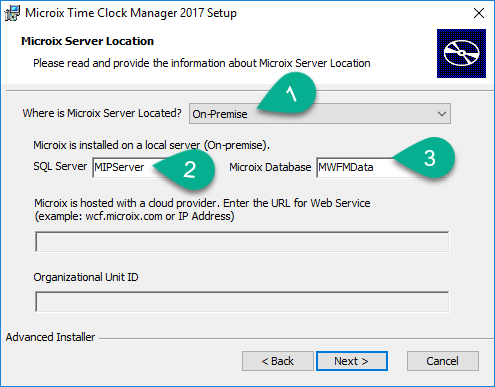
A) On-Premise Installation (MIP/Microix is installed on a local Server)
- Select “On-Premise”
- Enter the MIP/Microix SQL Server with instance name if applicable
- Enter the name of your Microix database. MWFMData is the default name unless it was changed
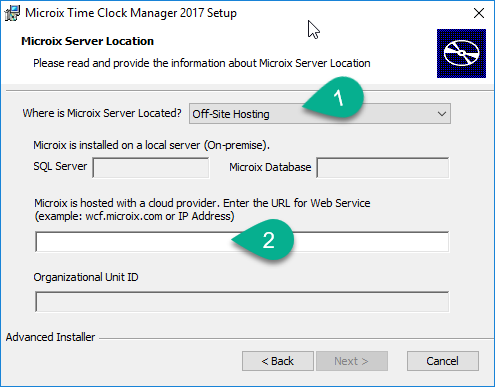
B) Off-Site Hosting(Microix and MIP is installed on a hosted server)
- Select “Off-Site Hosting”
- Enter the location of your Microix WCF Service or IP address
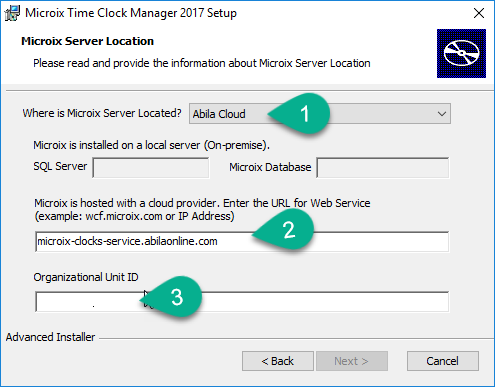
C) Abila Cloud (Microix is Hosted on Abila Cloud Server - Multi-tenant environment)
- Select “Abila Cloud”
- Enter the URL for Web Service - microix-clocks-service.abilaonline.com
- Organizational Unit ID - Contact Abila Professional Services and ask for your customer’s Organization Unit ID
- Click Next and complete the installation process
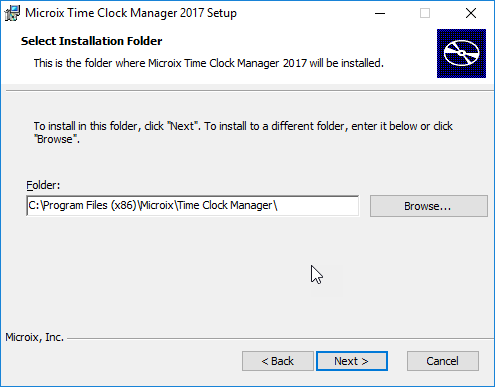
Step 4. Accept the default location and click Next
Step 5. Click Install and Finish to complete the installation process
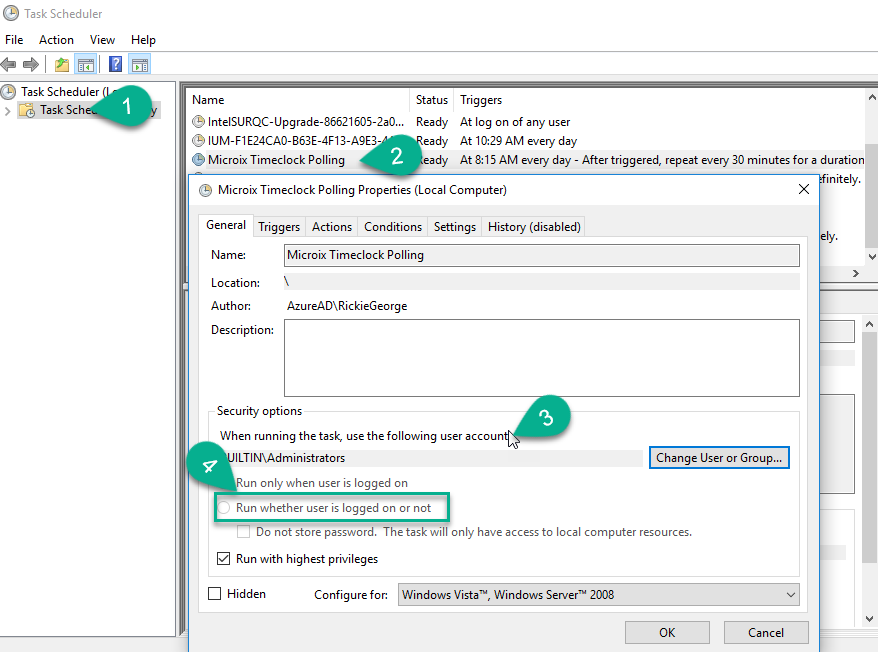
Step 6. Edit the Windows Task Scheduler and modify the “Microix Timeclock Polling” (Recommended: disable this task until all clocks are configured, then return to enable the task)
- Open task schedule and select “Task Schedule Library”
- Right click on “Microix Timeclock Polling” and select “Properties”
- Modify the user account if needed (user account should have local admin permissions)
- Choose the option “Run task when logged on or not”
- Save settings and exit
- Add your clocks to your LAN and add configure Time Clock Manager software