How to show vendor item number on the printed purchase order form
Creation date: 7/25/2018 1:20 PM
Updated: 7/30/2018 4:02 PM
Prerequisite: knowledge of Microix Forms Designer
(Note: Our instructions will focus on converting an existing column “Account Information” to show the Vendor Item No. However, you may add a new column to the table if needed.
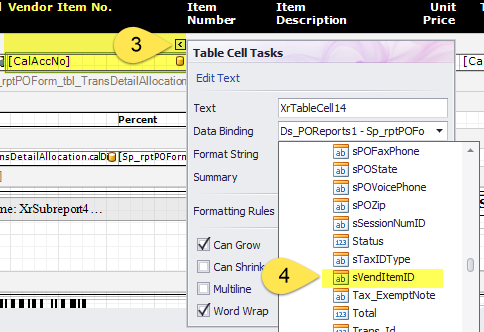
1. Locate the Account Information column and change the title to “Vendor Item No.”

2. Select the tag for the data field “[CalAccNo]” and change the Data Binding properties to “sVendItemID”. Resize the columns as needed and save the form.

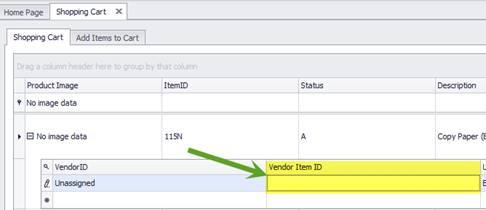
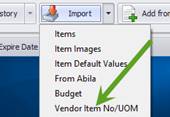
NOTE: For non-Inventory, Vendor Item No. can be entered or imported via the Shopping Cart Maintenance

NOTE: For Inventory Items, it can be entered/imported via the Inventory Items product information screen


(Note: Our instructions will focus on converting an existing column “Account Information” to show the Vendor Item No. However, you may add a new column to the table if needed.
1. Locate the Account Information column and change the title to “Vendor Item No.”
2. Select the tag for the data field “[CalAccNo]” and change the Data Binding properties to “sVendItemID”. Resize the columns as needed and save the form.
NOTE: For non-Inventory, Vendor Item No. can be entered or imported via the Shopping Cart Maintenance
NOTE: For Inventory Items, it can be entered/imported via the Inventory Items product information screen