Inventory Items Import
Creation date: 3/30/2018 3:36 PM
Updated: 3/30/2018 3:38 PM
Question: How to Import Inventory items?

Use the Inventory Items menu to import your inventory product list.
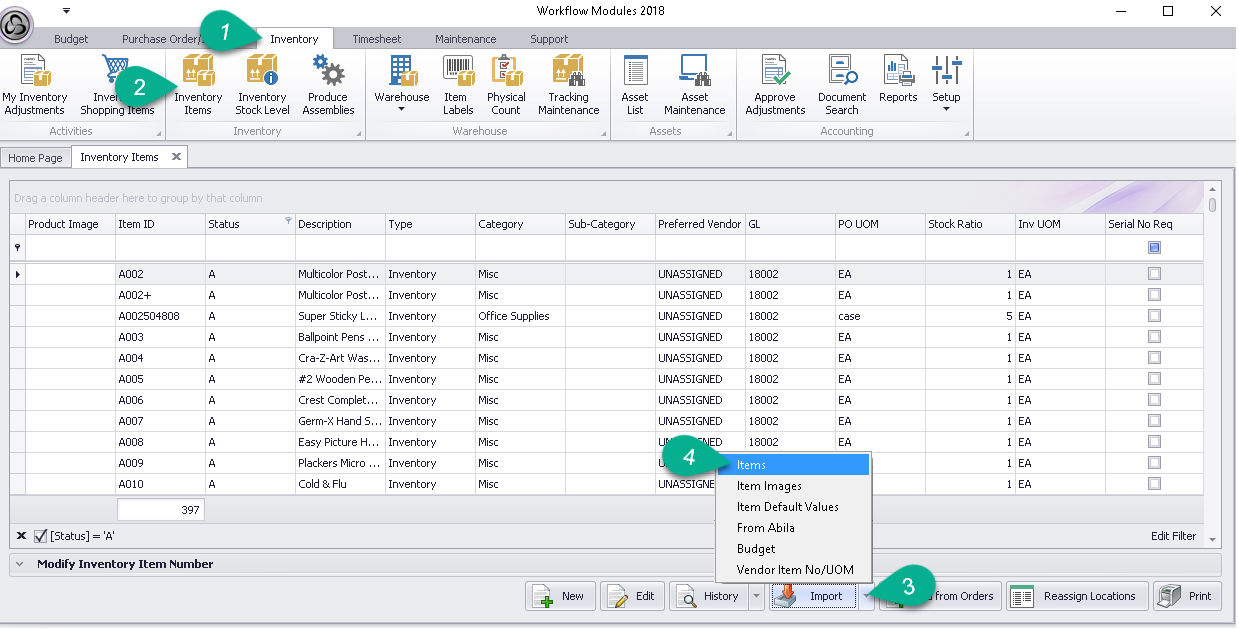
1. Select Inventory tab
2. Select Inventory Items menu
3. Click the dropdown button on Import, located bottom right in Inventory Item window
4. Select, Items
Next, an Import Options window appears.

We strongly recommend that you 'create a sample import template with all the columns that are available for import' and process it, to use in Excel by matching your data with corresponding columns. Then, you'll save the import template file with your data within as a CSV file for successful import.
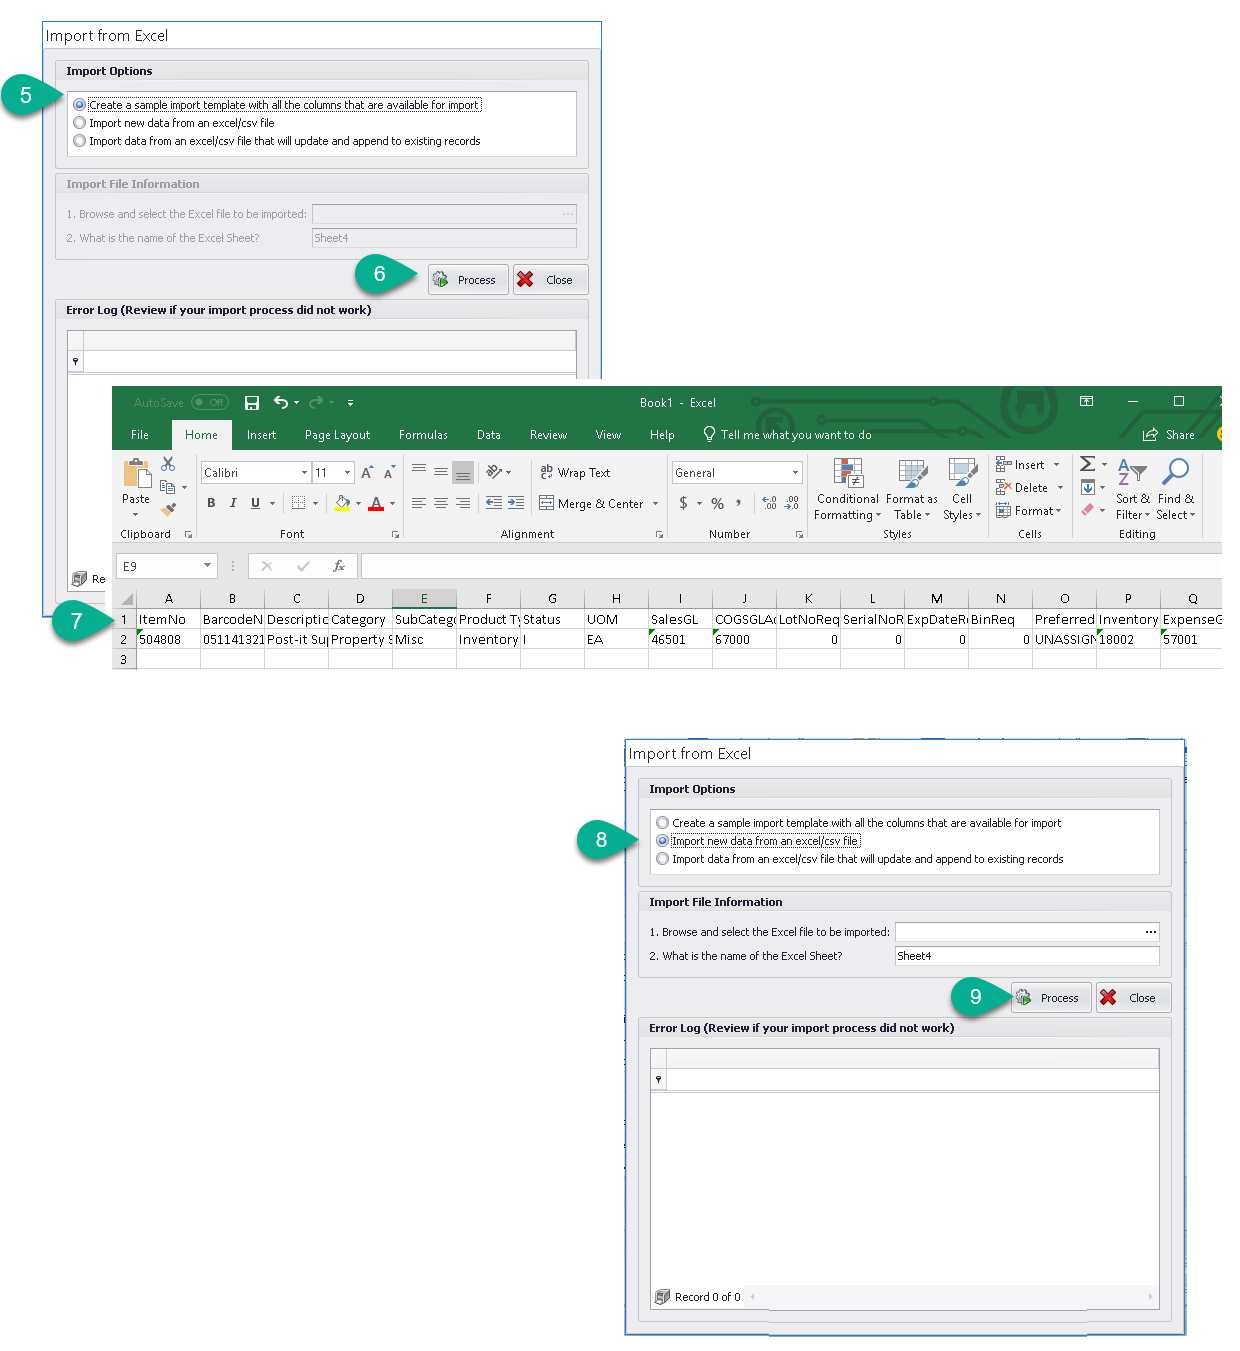
5. Import Options, select Create a sample import template with all the columns that are available for import
6. Click, Process
7. An Excel workbook opens with the sample data, add and/or replace with your data beginning on row 2 after the header top row, then save as CSV file (comma delimited text).
8. Click the dropdown button on Import, located bottom right in Inventory Item window and choose Import new data from an excel/csv file
9. Click, Process
Depending on the quantity of items the import may take up to 5 minutes to process. At process completion a list of the inventory items will appear. A refresh may be required.
Use the Inventory Items menu to import your inventory product list.
1. Select Inventory tab
2. Select Inventory Items menu
3. Click the dropdown button on Import, located bottom right in Inventory Item window
4. Select, Items
Next, an Import Options window appears.
We strongly recommend that you 'create a sample import template with all the columns that are available for import' and process it, to use in Excel by matching your data with corresponding columns. Then, you'll save the import template file with your data within as a CSV file for successful import.
5. Import Options, select Create a sample import template with all the columns that are available for import
6. Click, Process
7. An Excel workbook opens with the sample data, add and/or replace with your data beginning on row 2 after the header top row, then save as CSV file (comma delimited text).
8. Click the dropdown button on Import, located bottom right in Inventory Item window and choose Import new data from an excel/csv file
9. Click, Process
Depending on the quantity of items the import may take up to 5 minutes to process. At process completion a list of the inventory items will appear. A refresh may be required.