Adhoc Picking "Project" (custom field)
Using Inventory Scanner – Adhoc Picking “Project” field:

Adhoc picking allows employees to pick items using only the inventory scanner which can later be used to import into a picking document. Adhoc picking “Project” field was added by request for specific customers. This field will allow an employee to fill in a unique identifier when picking items. The items will then be sorted into separate documents based on this unique identifier during import.
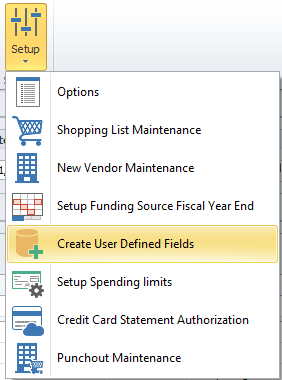
Setup: 1. Before you begin, you will need to enable a User Defined Field. Navigate to Requisition tab, select Setup > Create User Defined Fields.
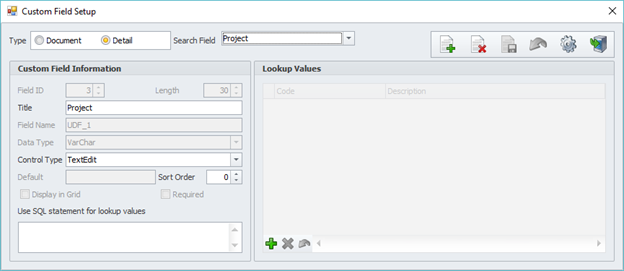
2. Choose the “create new” button. Select type of “Detail.” For title, name it accordingly. Control type will be ‘TextEdit.’ Everything else is OK as default. The result should mirror below.
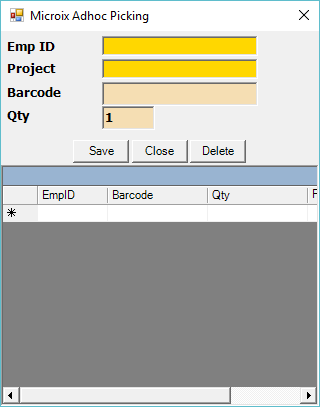
Utilization: 3. Back inside MicroixCE Barcode App, navigate to Adhoc Picking
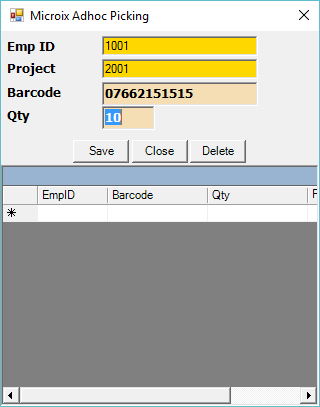
4. Enter EmployeeID, project code, barcode, and quantity. Press enter to confirm the entry. Press save to save the CSV file.
5. Import your items as normal using article 10845: https://www.microix.info/helpdesk/KB/View/10845-how-to-upload-barcode-data-into-microix-inventory
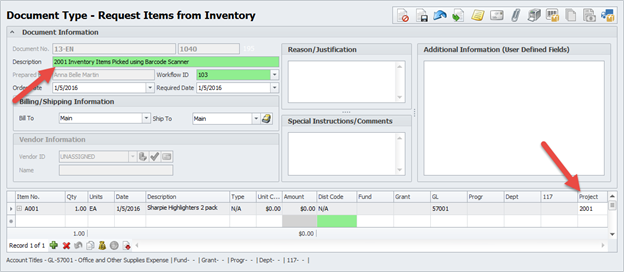
6. Note that items were sorted into documents based on Employee ID AND Project.
Adhoc picking allows employees to pick items using only the inventory scanner which can later be used to import into a picking document. Adhoc picking “Project” field was added by request for specific customers. This field will allow an employee to fill in a unique identifier when picking items. The items will then be sorted into separate documents based on this unique identifier during import.
Setup: 1. Before you begin, you will need to enable a User Defined Field. Navigate to Requisition tab, select Setup > Create User Defined Fields.
2. Choose the “create new” button. Select type of “Detail.” For title, name it accordingly. Control type will be ‘TextEdit.’ Everything else is OK as default. The result should mirror below.
Utilization: 3. Back inside MicroixCE Barcode App, navigate to Adhoc Picking
4. Enter EmployeeID, project code, barcode, and quantity. Press enter to confirm the entry. Press save to save the CSV file.
5. Import your items as normal using article 10845: https://www.microix.info/helpdesk/KB/View/10845-how-to-upload-barcode-data-into-microix-inventory
6. Note that items were sorted into documents based on Employee ID AND Project.