How do I complete Adhoc Picking with the barcode scanner?
How do I begin Adhoc Picking with the barcode scanner? Microix Adhoc Picking allows personnel to scan items out of inventory and automatically create the associated “Request Items from Inventory” document in Microix Workflow Modules. If the document is left at level 0, any picked items will continue to append to the document until its submitted for approval.
1. Open the barcode application from your device (icon is located on the desktop)
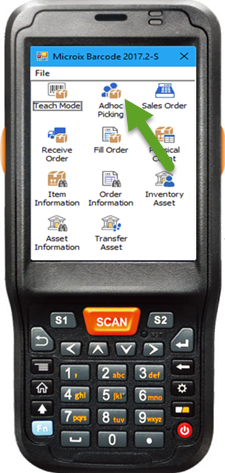
2. Select “Adhoc Picking” from the menu.

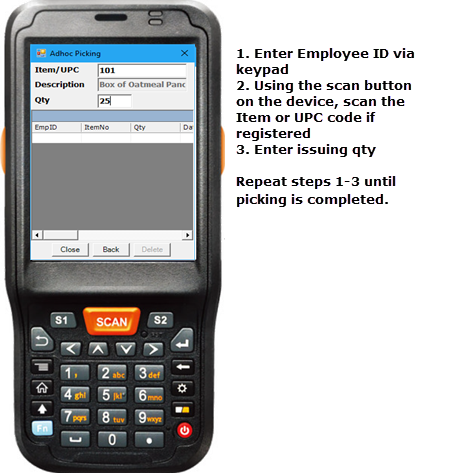
3. Perform the following steps to complete the picking process via the barcode scanning device:

4. After scanning all items, press the send button to transfer the data to Microix
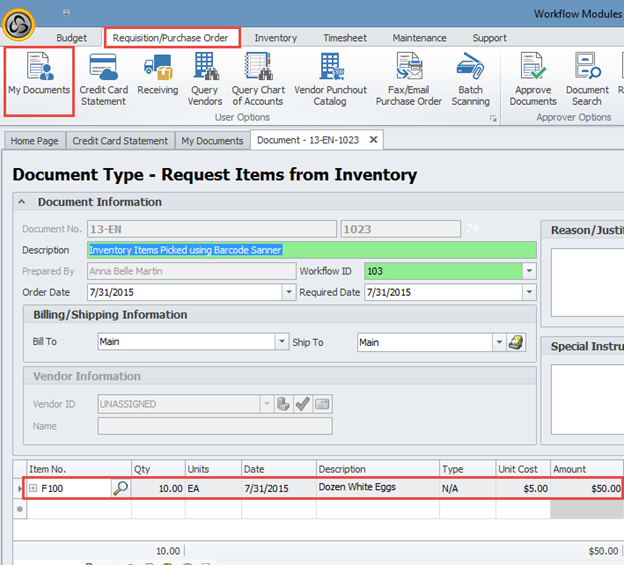
5. You can locate the new document in Requistion/Purchase Orders > My Documents for each employee or under the global account that were setup in Maintenance>Global Options>Global Settings
6. Submit the document for approval at the end of each day to process the journal entries into MIP

1. Open the barcode application from your device (icon is located on the desktop)
2. Select “Adhoc Picking” from the menu.
3. Perform the following steps to complete the picking process via the barcode scanning device:
4. After scanning all items, press the send button to transfer the data to Microix
5. You can locate the new document in Requistion/Purchase Orders > My Documents for each employee or under the global account that were setup in Maintenance>Global Options>Global Settings
6. Submit the document for approval at the end of each day to process the journal entries into MIP